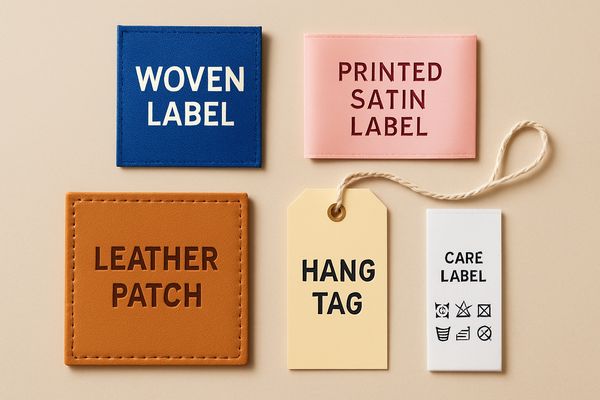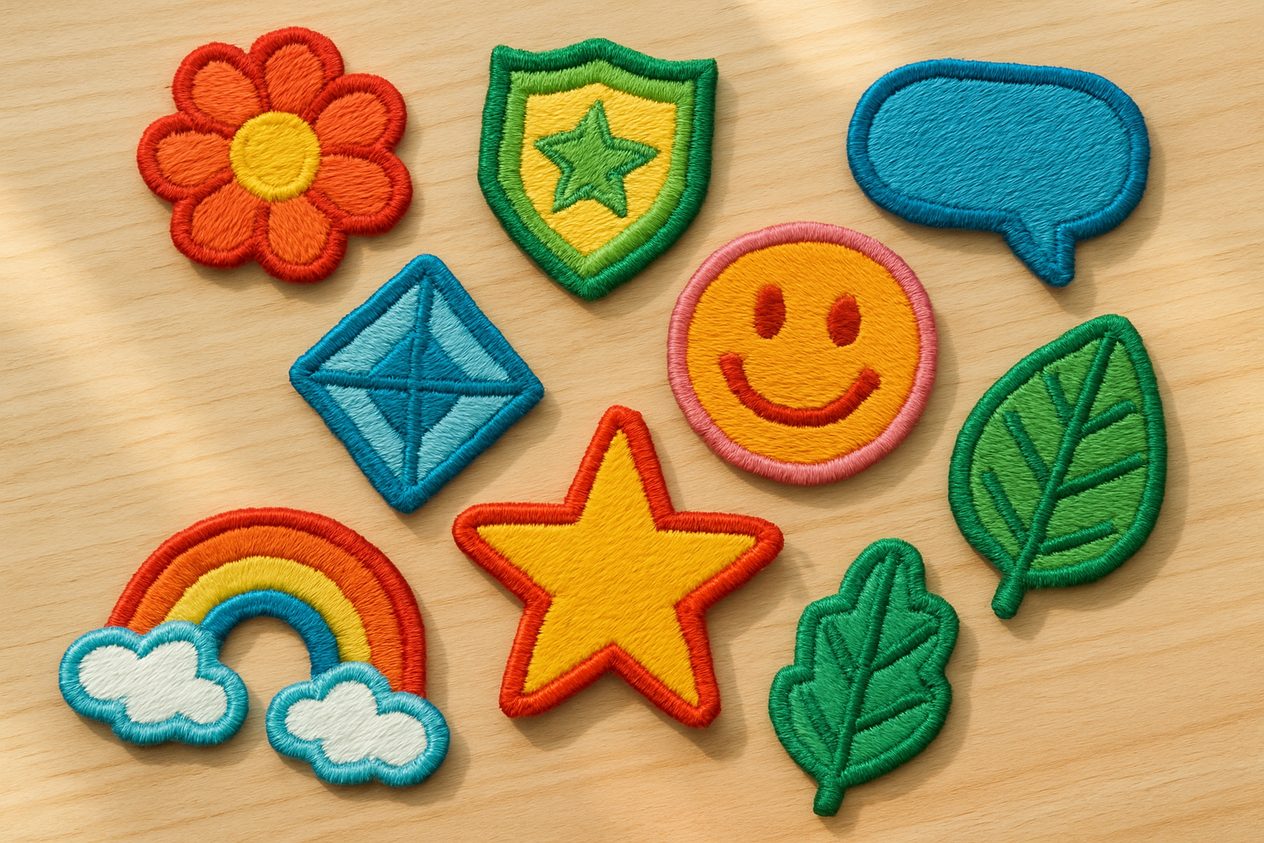
Custom embroidered patches add texture, color, and a handcrafted feel to caps, jackets, bags, and uniforms. They are one of the most durable ways to brand apparel — stitched thread holds up to years of wear and washing. This guide covers the patch styles, border and backing options, and what makes a design embroider well.
How embroidered patches are made
Embroidered patches are created by stitching colored thread onto a fabric backing (usually twill) until the design is filled in. Your artwork is first “digitized” into a stitch file that tells the embroidery machine exactly where each stitch goes. The patch is then cut to shape and finished with a border. Because the design is built from real thread, embroidered patches have a raised, tactile surface you can feel.
Patch coverage: full vs. partial embroidery
- Fully embroidered — thread covers the entire patch, including the background. The most premium, classic look.
- Partially embroidered — thread covers the logo and lettering while some twill background shows through. A bit more economical, and great when you want the twill color as part of the design.
- 3D / puff embroidery — foam under the stitching raises lettering for a bold, dimensional effect popular on caps.
Border options
The border defines the patch edge and prevents fraying. Common choices are a merrowed border (a thick, classic overlocked edge that works on round and simple shapes) and a hot-cut or laser-cut border (a clean, thin edge that follows custom and intricate shapes).
Backing options — how the patch attaches
- Sew-on — the most secure and traditional; ideal for items that get heavy use or frequent washing.
- Iron-on (heat-seal) — a heat-activated adhesive backing for quick application to cotton and poly-cotton garments.
- Velcro (hook & loop) — removable and swappable; standard for tactical gear, morale patches, and uniforms.
- Adhesive / peel-and-stick — for temporary or event use.
Not sure which to pick? See our full guide on how to attach patches.
Designing artwork that embroiders well
Embroidery is built from thread, so bold, simple artwork reproduces best. Keep these tips in mind:
- Use solid colors rather than gradients or photo-realistic detail.
- Keep small text at least about 1/4" (5–6mm) tall so letters stay legible in stitching.
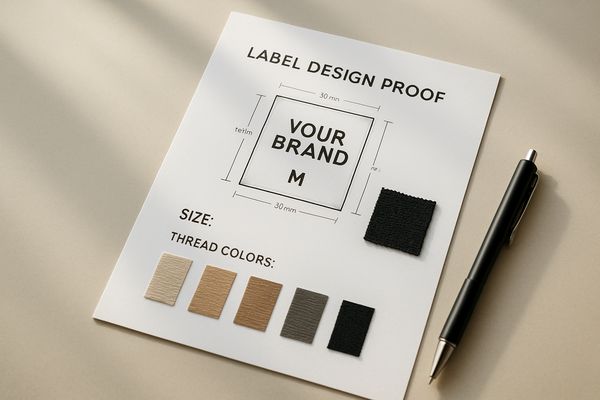
- Match thread to your brand with Pantone (PMS) thread color matching.
- Need fine detail, gradients, or tiny text? Consider printed, leather, or PVC patches instead.
Frequently asked questions
What is the minimum order for custom embroidered patches?
Minimums vary by size and complexity, but small starter runs are available. Send your design and we will quote your exact quantity — see our minimum order guide for how MOQs and pricing work.
Can embroidered patches be washed?
Yes. Sew-on embroidered patches are very durable. For iron-on patches that get washed often, we recommend reinforcing the edges with a few stitches.
What is the best backing for hats?
Sew-on or heat-seal backings work well on structured caps; 3D puff embroidery is especially popular for a bold front-panel logo.
Get a custom patch quote
Send us your logo and we will recommend the best patch style, border, and backing for your project. Request a free quote — no minimums to find out pricing.